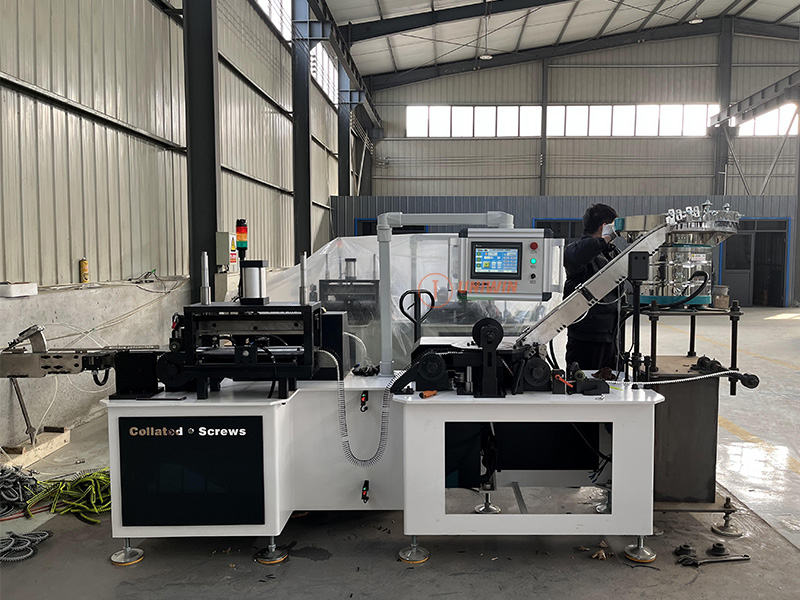
How to Install the Collated Screw Assembly Machine (Step-by-Step Guide)
Proper installation of a collated screw assembly machine is essential for achieving smooth, automated production of collated drywall screws. This step-by-step guide outlines the key installation and adjustment procedures of Uniwin automatic collated screw assembly machine to help you prepare the machine for accurate operation and reliable output.
Power On & Human-Machine Interface (HMI) Check
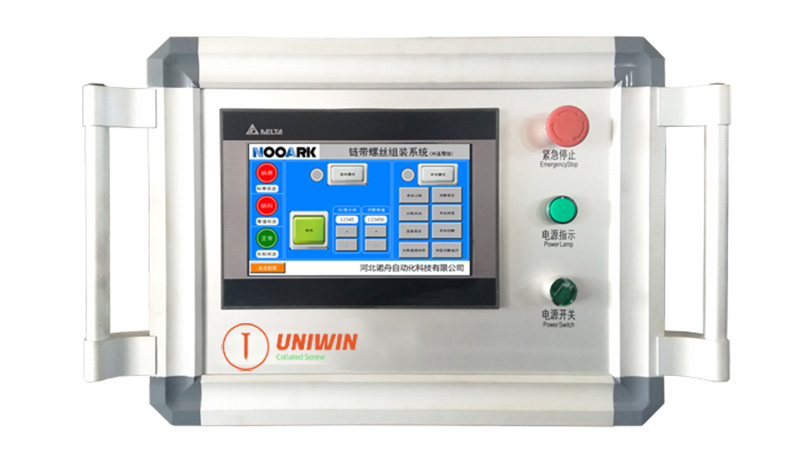
Turn the power switch clockwise to turn the machine on.
Confirm that the HMI screen lights up normally without displaying any error messages.
Ensure the emergency stop is in the reset state, and all buttons are in the default state.
Indexing Plate Alignment
Tap “Manual Mode” → “Indexing Jog” (single-step rotation of the indexing plate), and wait for the plate to automatically rotate clockwise until it finds the correct position and stops.
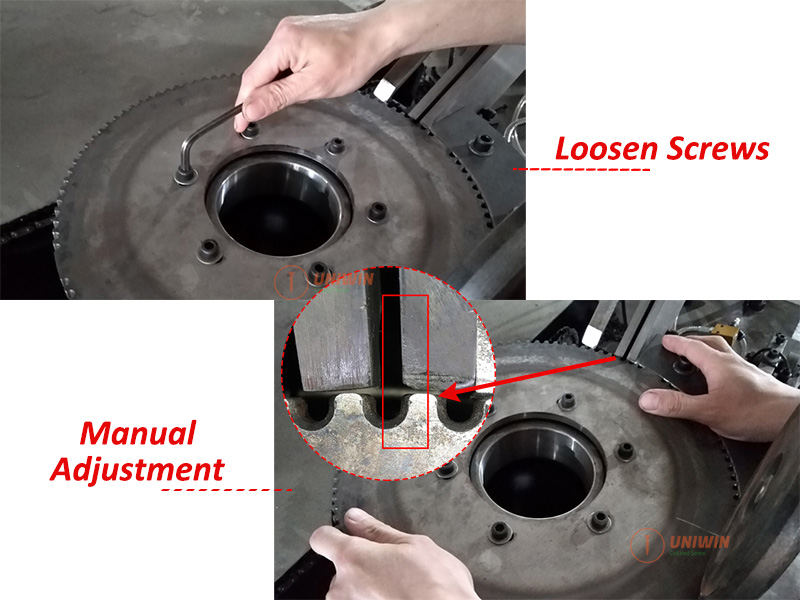
Next, loosen the six screws on top of the indexing plate counterclockwise.
Then, manually rotate the plate clockwise until the inner right edge of the plate station aligns precisely with the inner right edge of the slide rail outlet.
Once aligned, tighten the screws to secure the position.
Belt Feeding & Alignment
Securely mount the belt spool onto the feeding shaft.
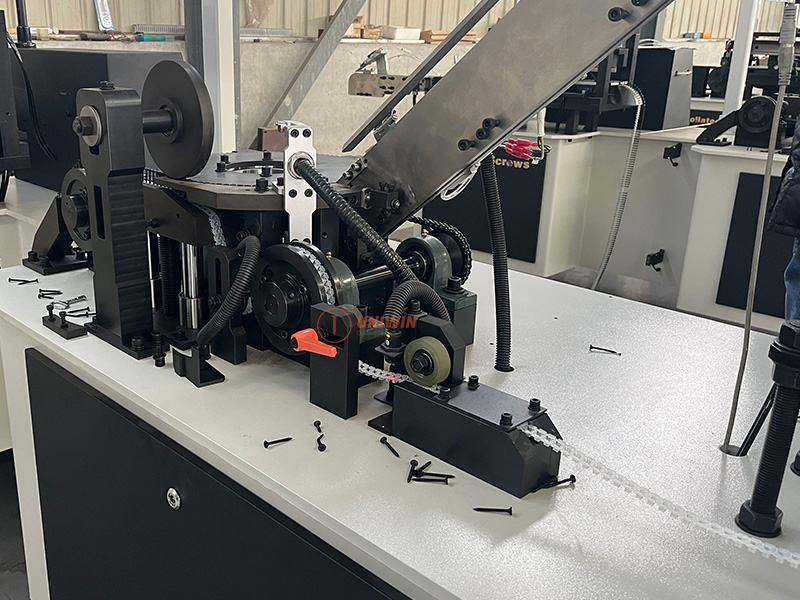
Pass the belt through the following components: Feeding inlet → Secondary feed gear → Tension wheel → Angle block → Main feed gear.
Then, loosen the fixing screws on both the main and secondary feed gears and rotate the inner adjustment discs clockwise or counterclockwise as needed, until the belt’s screw holes align precisely with the station opening on the indexing plate.
Once aligned, tighten all screws firmly to secure the position.
Screw Loading & Preliminary Assembly Adjustment
First, pour drywall screws into the vibratory feeder.
Next, tap “Manual Feeding” to start screw feeding. Screws will enter the first station of the indexing plate through the slide rail. Feeding stops automatically when the slide rail is full.
Then, tap “Indexing Jog” repeatedly until the first screw is positioned at the pressing roller with the belt.

Check if the screw is properly inserted into the belt hole — not too deep, too shallow, or misaligned. If needed, adjust the angle block height or belt gear position.
Pressing & Cutting Adjustment
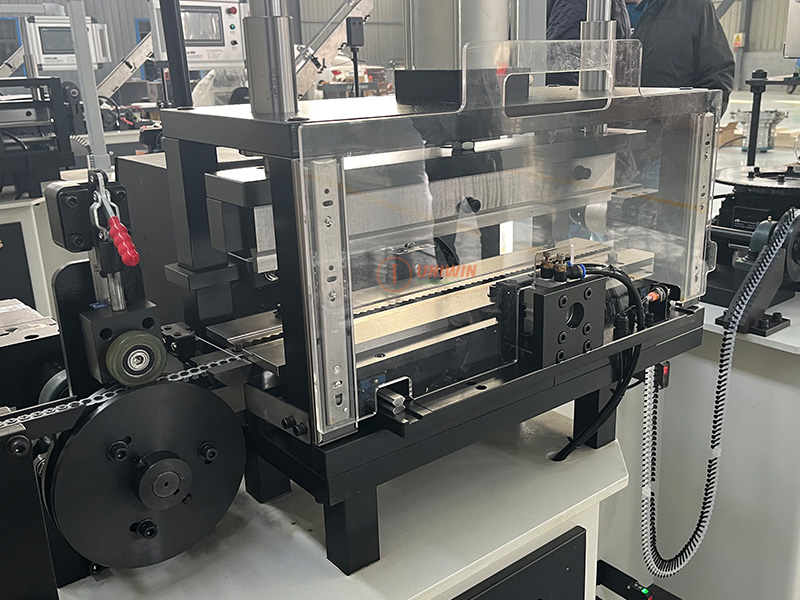
After completing the preliminary assembly, tap “Feed Continuous”. Once about 5 belts are assembled, tap again to stop.
Tap “Cutting Positioning”, and wait for the cutter gear to align.
Then, feed the pre-assembled screw belts into the pressing unit.
Tap “Manual Press” to press the screws fully into the belt holes.
Next, manually move the belt to the cutting unit. Align the cutting position with the blade and tap “Manual Cut” to complete the cutting process.
⚙️ Adjustments
Press Plate not pressing correctly? Tap “Plate Positioning” and adjust the height sensor.
Screws unstable? Adjust pressing force using + / – buttons.
Cut misaligned? Loosen cutter gear screws, adjust, and re-tighten.
Start Automatic Operation
After completing all adjustments, tap “Auto Mode” to switch to automatic operation.
Then tap “Start” — the machine will begin automated screw belt assembly and production.
Get the Most Out of Your Collated Screw Assembly Machine
With proper setup and alignment, the collated screw assembly machine can quickly transition into fully automated operation — delivering precise feeding, reliable pressing, and consistent cutting for stable production.
Need assistance with installation, customization, or spare parts?
Our technical support team is ready to help — ensuring your collated screw assembly machine runs smoothly from day one.